With Version 3.0, a new tool is available in BRAW Studio : the White Balance Picker.
Let's see in this article what the White Balance is, and why this tool could help you in your Color Correction workflow.
Note : If you are not familiar with BRAW Studio yet, check our introduction article !
The BRAW White Balance Settings
BRAW is a powerful video codec with a lot of potential while grading your footages in post-production.
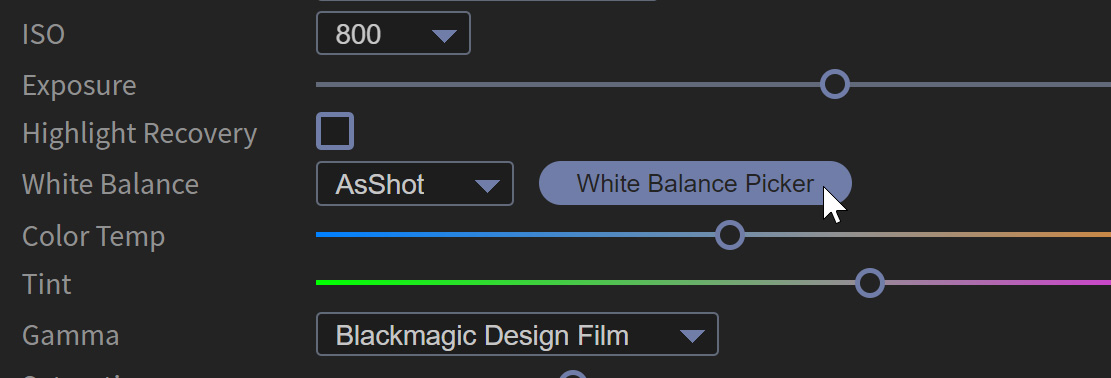
As BRAW is a "RAW" kind of codec, it has "Source Settings" associated, which are special Settings used when decoding the BRAW image, giving far better results than applying those change in a post effect. On those BRAW Settings, there is the White Balance composed of 2 parameters : "Color Temperature" and "Tint".
- "Color Temperature" sets the image look between blue and orange.
- "Tint" sets the image look between green and pink.
White Balance goes with some presets which sets both Color Temperature and Tint, and are often used from the shooting context : a clear blue sky (Daylight), a cloudy one (Cloudy), a room with hot lights (Tungsten), ..
But they are only presets and could not be accurate. They are generally used as a starting point to a more refined White Balance correction.
The White Balance Picker Tool
Another famous tool in post-production for White Balance correction is the "White Balance Picker" and could be more precise than presets.
The user selects a white or grey part of the image and White Balance controls (Color Temperature and Tint) are set automatically to make the selected pixel as "neutral" as possible, so white or grey.
It is a really good starting point in Color Grading to set all footages with the same "natural" colors. Later on, those values could be changed to add an artistic look.
Note that you should not click on an oversaturated light in the image (like a bright light) ! A White Balance Picker changes parameter and test the pixel look with those parameters. If the pixel is oversaturated, it is going to be always the same color whatever the white balance controls, and so any values can be a "good result".

How to use the BRAW Studio White Balance Picker
With BRAW Studio installed, you have access to the White Balance Picker from the Adobe plugin effects : Source Settings in Premiere Pro, Layer Settings in After Effects and from the BRAW Studio Panel in Premiere Pro.
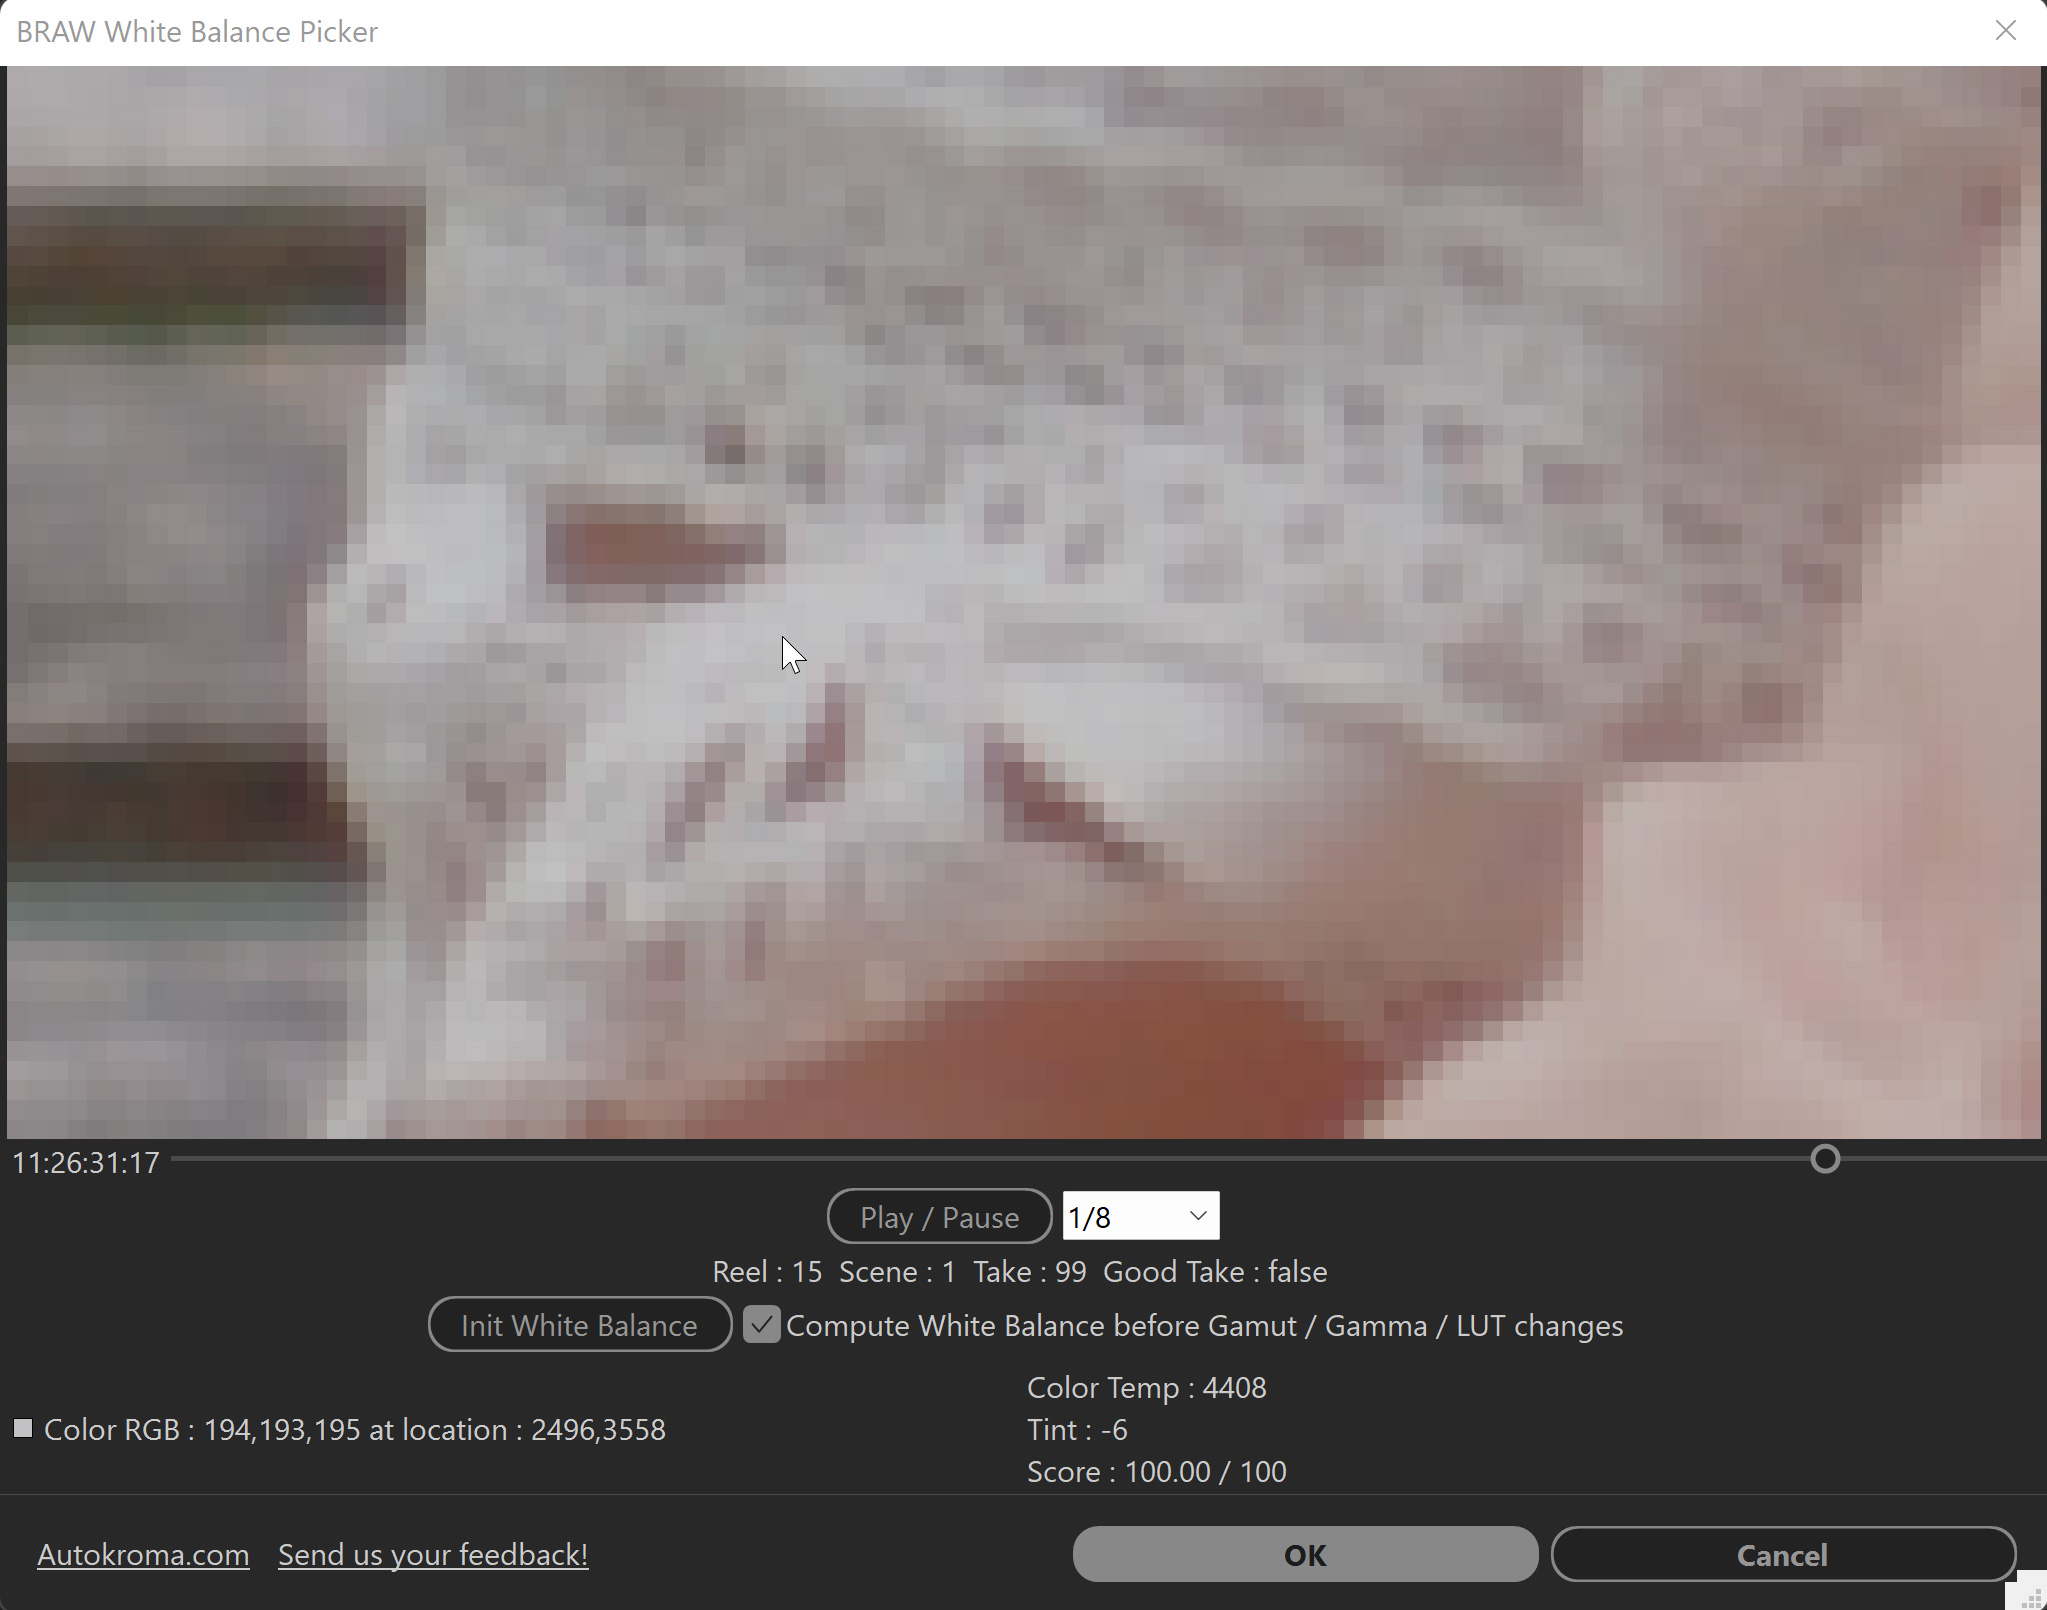
Clicking on the "White Balance Picker" button opens another window with a little player. You can zoom into the image with your mouse wheel to select more precisely a white/grey pixel in the image. Clicking on the image starts the White Balance Computation from the pixel location you chose.
You can reset the White Balance look to the initial look by clicking on "Reset White Balance".
White Balance Computation is by default computed before some other parameters : Color Space, Gamma and LUT. To be more precise, those parameters are considered with constant values : Color Space is "Rec. 709", Gamma is "Linear", and no LUT is applied. That generally gives better results.
In case you would want to compute White Balance on your custom Color Space, Gamma and/or LUT applied (and so get a white/grey selected pixel with those settings applied), you just need to set them before launching the White Balance Picker tool, and untick the checkbox setting : "Compute White Balance before Gamut / Gamma / LUT changes".
Are you using the White Balance Picker ? Do you find it useful ? How could we improve it ? Contact us to tell us !

